You’ve started selling WordPress care plans and you’re excited to begin generating recurring revenue for your business. But let’s say you become incredibly successful in this venture. How the heck are you going to handle processing and tracking those payments? Luckily, with WooCommerce and a trusty payment gateway like Stripe, you don’t have to.
Watch the tutorial below for a step-by-step breakdown on how to grow recurring revenue by integrating a payment gateway into your website.
Make Even More Money with the Help of a Payment Gateway
You have to get paid for the work you do. But unlike one-time web development projects which require carefully-laid payment plans and payment collection methods, recurring revenue opportunities are a whole lot easier to manage. All you have to do is automate the process with a payment gateway.
In general, a payment gateway is a highly beneficial tool for business owners.
- It streamlines the whole process for both you and the client. The client submits only one payment and then the gateway handles all subsequent payments.
- It integrates with WordPress, which makes the payment process feel seamless even if payments are handled by a third party.
- It saves you the embarrassment and frustration of having to track down a client and ask them to pay for their recurring services.
- It spares you the inconvenience of capturing the wrong payment information and having to ask the client to give it to you again.
- It provides you and your clients with a more secure way of handling business transactions.
- It enables you to accept many more payment types, which allows you to access a greater number of clients.
Then, of course, there are the benefits of a payment gateway like Stripe. While you could certainly use PayPal, there are certain features of Stripe that make it the ideal choice for WordPress consultants. For example:
- It’s a developer-friendly platform, which means you have much more control over customization.
- It comes with a recurring subscription tool.
- It’s one of the most global-friendly payment gateways you’ll encounter.
- In general, funds are more quickly deposited into your account than they would with any other gateways.
- It has a WordPress/WooCommerce plugin.
This leads us to…
How to Grow Recurring Revenue with a Stripe Payment Gateway
A couple of weeks ago, I showed you how easy it is to sell WordPress care plans with a dedicated pricing page. In this Agency Mavericks Studio session, I break down the process of streamlining recurring revenue generation by adding Stripe to the pricing page.
Here is what the session covers:
Step 1: Add WooCommerce Plugins
There are three plugins to install and activate:
WooCommerce Stripe Payment Gateway

Step 2: Get a Stripe Account
It’s free to sign up and get an account with Stripe. The only costs of using the payment gateway are the ones charged per transaction (which is standard).

Once your account is created and verified, go to the Developers tab to access the keys you need in the next step.
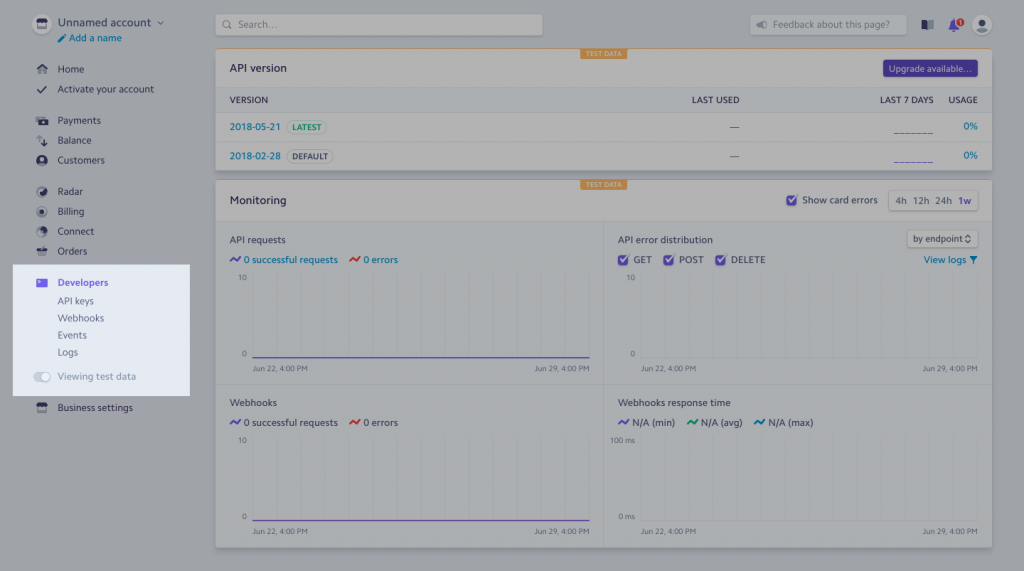
Hit the toggle for “Viewing test data”, so that the keys are generated for the setup and test.
Step 3: Connect Stripe to WooCommerce
Inside the WordPress dashboard, navigate to the WooCommerce > Settings menu. From here, you’ll select the Payments tab.
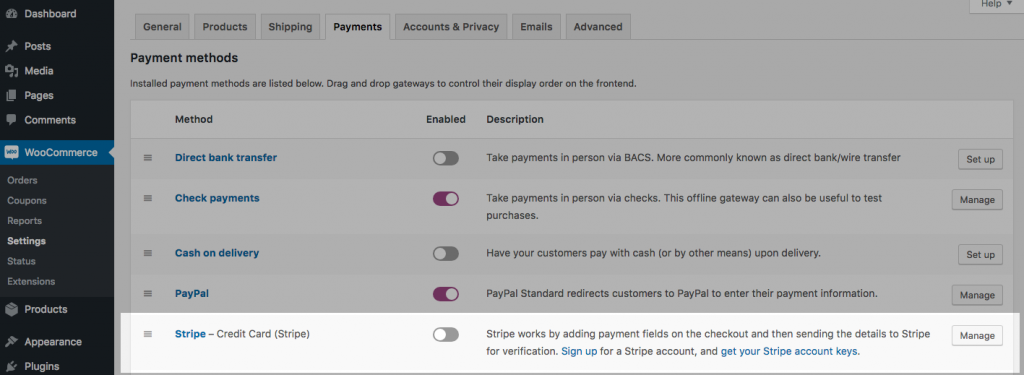
As you can see, WooCommerce has automatically enabled several payment options. To configure Stripe payment processing, hit the toggle and select “Manage”.
Under Webhook Endpoints, click on “Enable Test Mode”. Then enter the Test Publishable Key and Test Secret Key from Stripe.
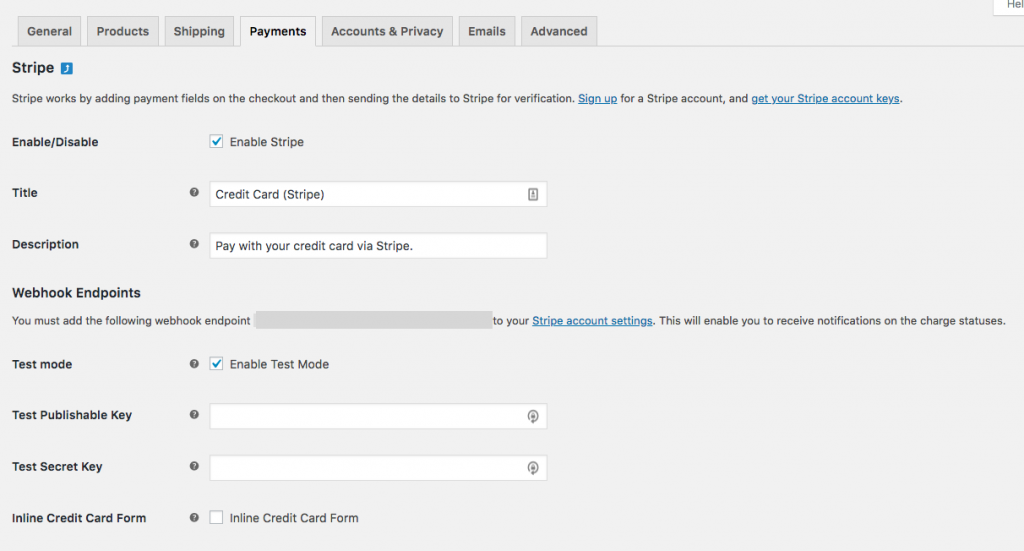
Once you’ve confirmed that the payment gateway works, you can return here, remove the “Viewing test data” switch, and retrieve the live keys.
Step 4: Create the Subscription Product
You will need to create a “product” for each care plan subscription you offer.
To do this, go to Products > Add New.
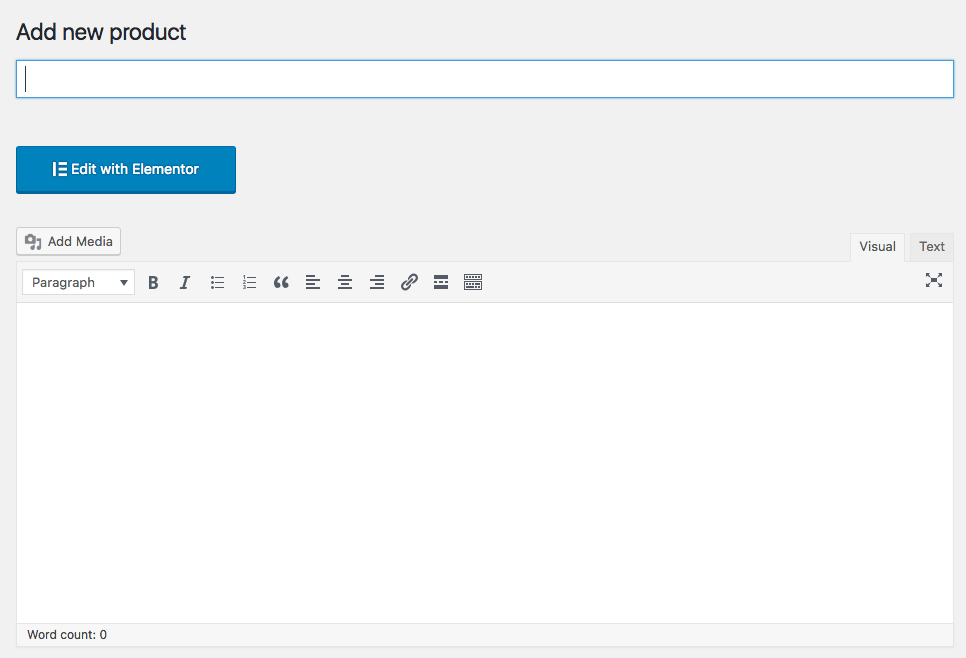
Add the name of your subscription plan to the Title field and then scroll down for more options.
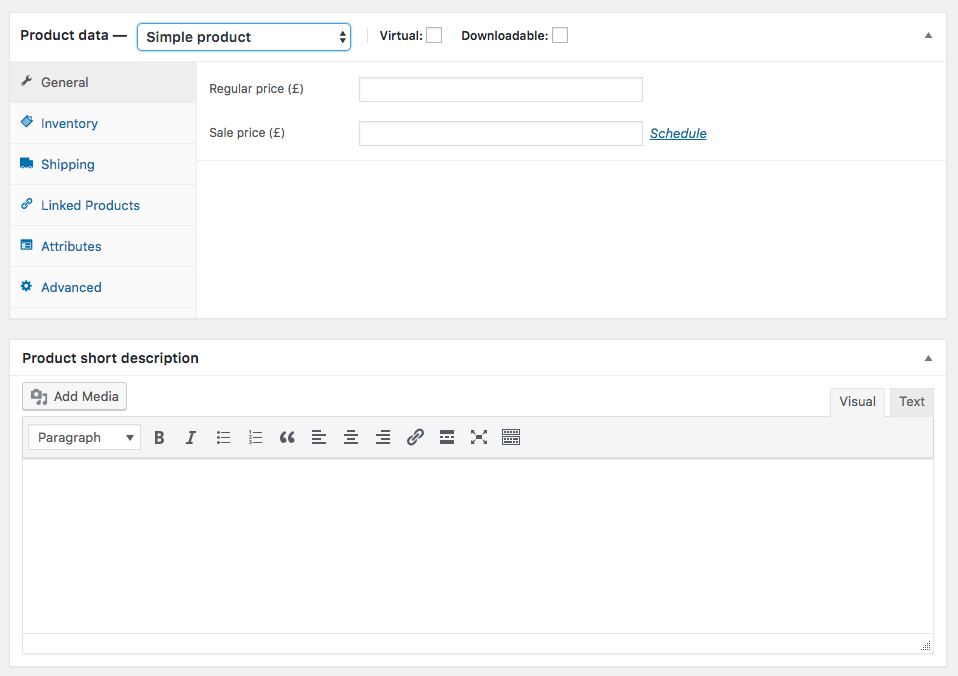
In the next section, set the product data to “simple subscription”. From here, you can select “Virtual” and add a price.
Below that is a short description field. Take a few minutes to enter details that will be displayed to subscribers along with a link back to the main care plans page.
To the right of these fields, don’t forget to fill in the Website Care Plan category, which will keep your subscriptions and products organized). Also, add a product image with relevant alt text.
Preview the product page and Publish when you’re happy with the results.
Step 5: Connect Subscriptions to WordPress Care Plans Page
Return to your WordPress Care Plans page in WordPress and open it with Elementor.
Originally, when we designed the pricing tables, we left the button link empty.
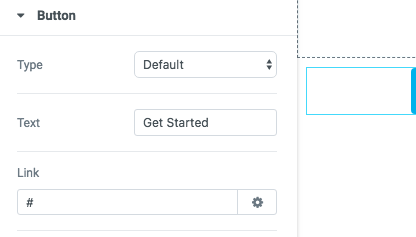
Now, we want to connect those buttons to each of the subscription products you have created. However, we don’t want to force clients to take an unnecessary step if they don’t need to. Your pricing page already explains what is included in the plan, so they don’t need to see the subscription page again.
Instead, we want to program these buttons to automatically add the subscription plan to their cart and cut down on the steps to check out.
To do this, populate the Link field with the following:
[yourURL]/checkout/?add-to-cart=[productid]
Do this for all pricing plans in the table.
Save your changes and test the buttons on the preview page. If they work correctly, and you’re ready to start selling WordPress care plans, go back and replace the test keys from Stripe with live ones.
Wrap-Up
Any chance that you have to run your WordPress business from your website is ideal. By adding a Stripe payment gateway to it, you can easily grow your recurring revenue business while simplifying the whole process for both you and your clients.


